mad spatula
Golden, airy focaccia with a crisp crust, dimpled surface, and herb or topping details visible on top.

Quick No-Knead Focaccia (Soft, Airy & Crispy in 2 Hours)

Time2 hr 40 min
DifficultyMedium
Servings8

Contains: Wheat/Gluten

About allergens

Looking for the perfect homemade focaccia recipe that’s soft, airy, and full of flavor? This easy no-knead focaccia is everything you want - crispy on the outside, fluffy on the inside, and topped with briny olives, sweet sun-dried tomatoes, and fragrant rosemary.

Made with simple ingredients and a beginner-friendly method, this focaccia relies on time and a few stretch-and-folds to develop its signature texture. No mixer, no complicated steps, just incredible results every time.

This easy homemade focaccia is one of those recipes that looks impressive but is surprisingly simple to make. Once you try it, it’s hard to go back to store-bought.

Whether you’re making it for a cozy dinner, a gathering, or just because, you’ll end up with a beautifully golden, flavorful bread every time.

Tray used: 20 × 34 × 6 cm (8 × 13 × 2.5 inches)

Why You’ll Love This Focaccia

  • Beginner-friendly recipe - no kneading required
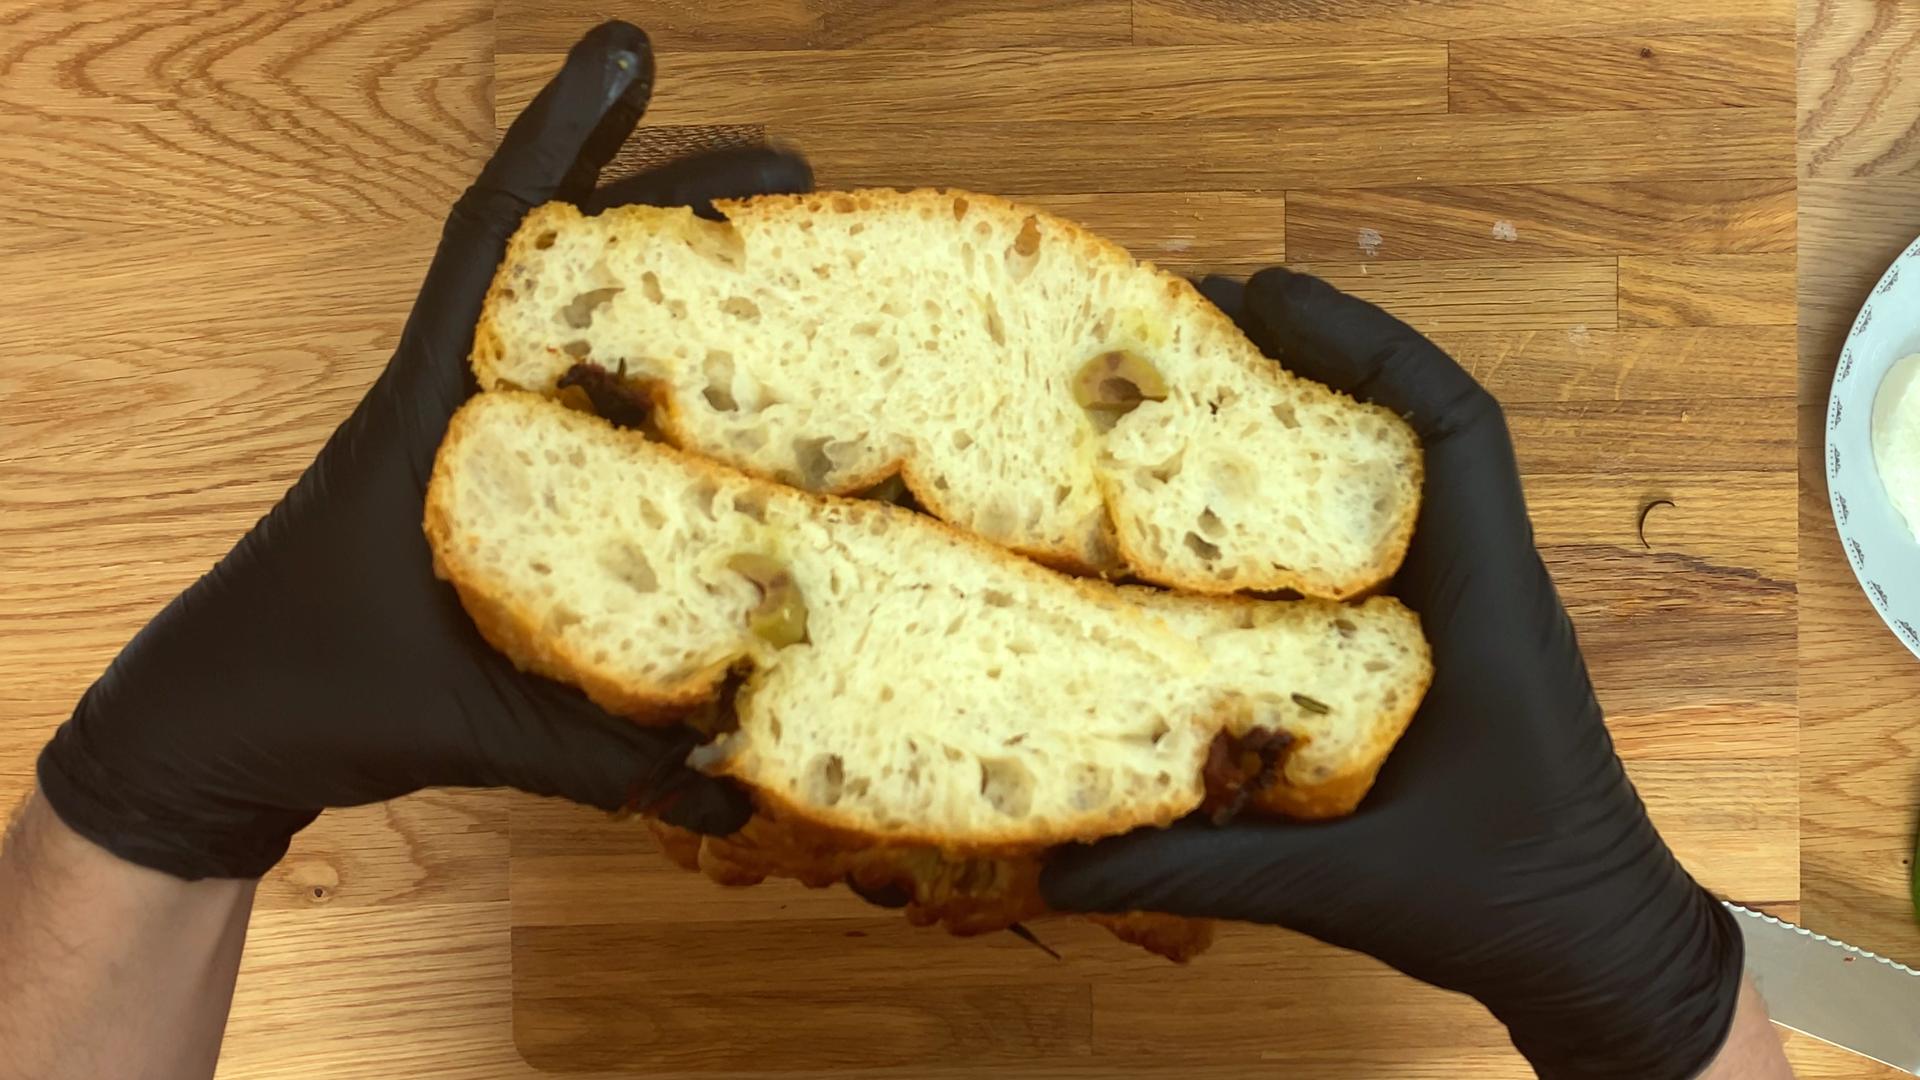
  • Light and airy texture with a soft, open crumb
  • Crispy golden crust thanks to olive oil and proper baking
  • Rich Mediterranean flavors from olives, sun-dried tomatoes, and rosemary
  • Perfect for sandwiches, sides, or dipping

Key Tips for Perfect Focaccia

  • Time = texture
    The resting periods allow gluten to develop naturally, giving you that classic airy structure without kneading.
  • Olive oil is essential
    Don’t hold back - olive oil creates the signature crispy bottom and adds depth of flavor.
  • Look for bubbles
    Well-proofed focaccia dough should be full of visible air bubbles before baking. For best results, let the dough rest in the fridge overnight to develop more flavor and a lighter texture.
  • Dimpling matters
    Pressing your fingers into the dough helps distribute toppings and creates those iconic pockets.
Common questions

Can I let the dough rest overnight?

Yes - resting the dough in the fridge overnight develops more flavor and a lighter texture, so it's worth planning ahead if you have time.

My dough isn't bubbly before baking - what went wrong?

It likely needs more time to proof; a well-proofed dough should look visibly airy with bubbles at the surface before it goes in the oven.

Can I change the toppings?

Yes - olives, sun-dried tomatoes, and rosemary are the classic combination here, but caramelized onion, cherry tomatoes, or other herbs work just as well.

Recipe

Quick No-Knead Focaccia (Soft, Airy & Crispy in 2 Hours)

2h 15mPreparation
25mCooking
2h 40mTotal
Servings
8

Ingredients

Instructions

  1. 1

    Start by pouring lukewarm water into a large mixing bowl. Add the salt and dry baker’s yeast, then give everything a gentle stir until combined.

  2. 2

    Once the yeast mixture is ready, add the flour and mix until you get a cohesive, slightly sticky dough with no dry patches remaining. Cover the bowl and let the dough rest for 30 minutes.

  3. 3

    After the first rest, lightly wet your hands with water and begin the stretch and fold process. Gently pull one side of the dough upward and fold it over itself. Rotate the bowl and repeat this motion on all sides. Keep your hands damp between each fold to prevent sticking.

  4. 4

    Let the dough rest for another 30 minutes, then repeat the stretch and fold. Continue this process a total of 4 times, allowing the dough to rest 30 minutes between each round. You’ll notice the dough becoming smoother, stronger, and more elastic with each set.

  5. 5

    Once all stretch and folds are complete, generously oil a baking tray with about 2 tablespoons of olive oil. Transfer the dough into the tray. Drizzle an additional 1 tablespoon of olive oil over the top, then lightly coat your fingers with a bit of oil. Gently press and spread the dough to fit the tray, dimpling it as you go.

  6. 6

    Using your fingertips, dimple the surface of the dough. Cover and let it rest for an additional 30 minutes. During this time, the dough should become airy and develop visible bubbles - this is how you know it’s ready.

  7. 7

    After the final rest, scatter green pitted olives, dried tomatoes, and fresh rosemary over the dough. Press everything in by dimpling again with your fingers, helping the toppings stick so they won’t fall off during baking. Finish with a sprinkle of flaky sea salt.

  8. 8

    Bake in a preheated oven at 200°C (390°F) with the fan on for around 25 minutes, or until the focaccia is beautifully golden brown.

  9. 9

    Once baked, allow it to cool slightly before removing from the tray and slicing - just enough so you don’t burn your fingers. Then enjoy while still warm.

  10. 10

    We used a baking tray: 20 × 34 × 6 cm / 8 × 13 × 2.5 inches.

Nutrition Facts

per 100 g
Calories
202
kcal
Fat
4.6g
Saturated
0.8g
Carbs
34.3g
Fiber
1.5g
Sugar
0.6g
Protein
5.6g
Salts
1.2g

Nutritional values are approximate estimates intended for informational purposes only. If you have dietary restrictions or medical conditions, please consult a qualified healthcare professional before making changes to your diet.

Glycemic Estimate

per serving
Glycemic Index
84
LowMediumHigh
Glycemic Load
42.4
LowMediumHigh
Blood Sugar Response
LowMediumHigh

Peak rise expected around 45m after eating

This is an estimated glycemic response and may vary based on individual metabolism and ingredient preparation. Learn more about GI and GL.

Storage & Reheating

  • 1

    Storage: Store cooled focaccia airtight at room temperature for 2 days, or in the fridge for up to 5 days. It also freezes well, whole or sliced, for up to 2 - 3 months - wrap tightly to prevent freezer burn.

    Reheating: Warm in a 180°C (350°F) oven for 8 - 10 minutes to re-crisp the crust; a toaster oven works well for individual slices. Avoid the microwave, which makes it chewy rather than crisp.

You might also enjoy